
The Big Tools
Physical engagements are best worked in teams. For cost reasons, it is usually best to have a set of the big ticket items that can be shared by the team. It isn’t generally necessary, for example, for everyone to have their own badge printer. So what should be in that kit?
Badge Printer
Most organizations use access control badges to permit access to their buildings. Anyone that doesn’t have a badge that looks right is going to be subject to far more scrutinty than someone who does not. In terms of looking the part of someone who belongs, a badge goes a long way in gaining trust.
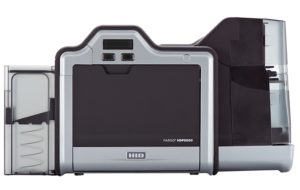
There are two basic flavors of badge printers. The first are direct to card (DTC) printers. These are usually cheaper and smaller. The disadvantage to these is that the print quality is often lacking, as the variations in the card surface present an uneven surface for the printer to print on, usually resulting in some flaws. They also generally cannot print edge to edge, meaning a small border will always be left.
Reverse transfer printers, however, use a two step process. The image to be placed on the badge is first printed on a transparent film, and that film is then fused to the badge. This method will result in a badge that can be printed edge to edge, with better image quality and more vibrant colors. This comes with the cons that these printers are generally more expensive than DTC printers and also tend to be bulkier.
The final option if a badge printer is out of your price range is an inexpensive, portable inkjet printer. While not ideal, these can produce perfectly functional and presentable badges, if made with care. If you go with this option, do be aware that you want to have some kind of adhesive to keep the printed surface on the badge. An off-kilter badge front is a dead giveaway that a badge is fake.
Badge Reader
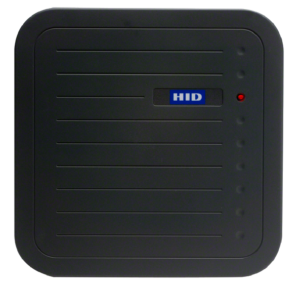
The other critical item for access control attacks is a badge reader, specifically the large garage badge readers that will allow enhanced read range over the standard, small readers you see next to doors. If you want to cover most organizations, you will need two readers, a low frequency reader and a high frequency reader to cover the most common badge types, which are the 125 kHz family including the most common format, Proxcard II, and a high frequency reader for reading 13.56 MHz cards such as HID iClass. The most frequently utilized readers for these are the HID MaxiProx5375 (low frequency) and the HID R90 (high frequency). However, if you can only purchase one of these readers, the low frequency cards are still in use at most organizations, as they are generally the far less expensive option. These often come up for sale used on eBay as they are sold off by building liquidators.
Once you have the readers, you will next need to weaponize them. The Wiegotcha project by lixmk is a great project to do exactly that with step by step instructions. In addition to capturing card data, it will also deploy a web server and wireless network that can be used to see what card data you’ve gathered via a convenient web interface.
Dropbox

Network access and network exploitation are often a critical part of a physical attack. While you can probably gain access to everything with enough time and effort, gaining access to the network and resources within it will almost always make physical testing more effective. The information that can be gathered can be invaluable. You can often find things such as alarm codes in people’s email and gain access to important resources such as building maps, the access control system itself, or surveillance systems. Getting access to the network and gaining compromise is very often a goal for clients.
I generally look for devices with non-SD card storage, at least 4 GB of RAM, dual NICs (important for doing layer 2 NAT to bypass 802.1x), and a built in wireless interface. Raspberry Pis can be used, but the boot partiton’s reliance on a non-journal FAT32 file system and lack of a power button mean that an uncleanly shut down Pi will not boot, and you will have to find a monitor and plug in to troubleshoot – far from ideal. I suggest loading the dropbox with all the tools you want prior to deployment, as getting tools over the client’s network can and will get you caught.
Mobile Hotspot
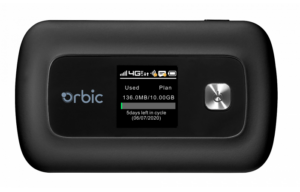
Once you have your dropbox, you will need a way to call back to the outside world. While it may be possible to punch out using a guest network in the area or through the client’s network, the best practice is to use a mobile hotspot for command and control traffic. That way, there is no C2 traffic going over the client’s network for them to detect, and you will not be reliant on finding a working, reliable guest network on the premisis.
Hard Drive Dock
A hard drive dock is also often a valueable tool on engagements. Many organizations still fail to encrypt their hard drives, so it’s often possible to extract hard drives from systems, read their contents, and maybe even get some local admin hashes.
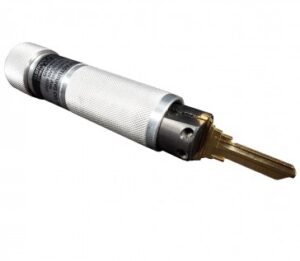
Code Machine
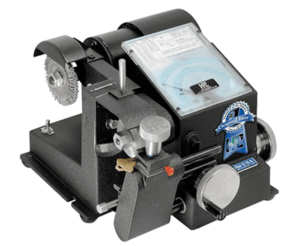
While certainly in the nice to have but expensive category, a key origination machine also known as a code machine allows the creation of keys without a blank to duplicate. These come in very handy for preparing blanks for impressioning, making bump keys, or cutting well known common keys.
Key Extractor Set
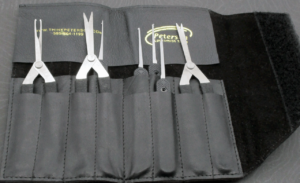
If you’re going to do any key impressioning, you’ll eventually have a key break off in a lock. Angry customers are not repeat customers. Keep an extractor set handy.
Yardstick One/SDR
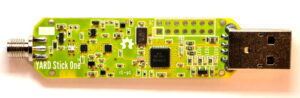
A Yardstick One, or any SDR capable of transmitting in the 433 MHz range is very useful. Many electric gate openers and garage doors at commerical locations still do not use rolling codes, and so are vulnerable to replay attacks, as well as brute forcing, such as Samy Kumar’s Open Sesame attack. Wireless alarm systems and other sensors frequently operate on the 433 MHz frequency.
Individual Tool Kit
Next up are tools that ideally everyone would have with them, or at least in a vehicle. Some could certainly be combined in to a team kit, but having the ability for each member to work independantly is generally worth the additional expense.
Crash Bar Tool
The crash bar tool is used on double doors that are equipped with a crash bar for those exiting. Given enough of a gap, the tool can be pushed through the door, where it can then push the crash bar. Bosnian Bill has a good demo of this tool.
Thumblatch Tool
This tool is used to turn thumbatches on the interior of the door. You can see a demo of this tool on the LockPickingLawyer’s Youtube channel.
Under the Door Tool
Only have money for one bypass tool? This is the one to get. This tool is placed under the door, then lifted up to engage the door handle. By fire code, these are typically lever-style handles as opposed to knobs, so pulling down on the cord will open the door.
Wafer Picks and Jigglers
While picking wafer locks is not hard, you will run in to many of them in a typical office environment, generally in the form of drawer locks. While you can manually pick them all, these usually work much more quickly.
Padlock Shims
![]()
These are used to push down in to the body of the lock along the shackle to shove the latch out of the way. These are basically the padlock equivalent of a shove knife. These can be bought commercial or made.
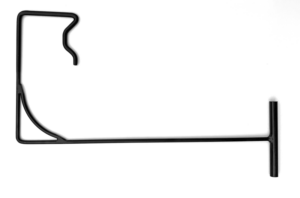
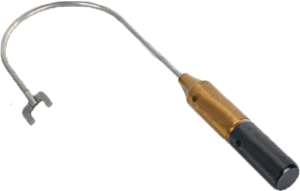
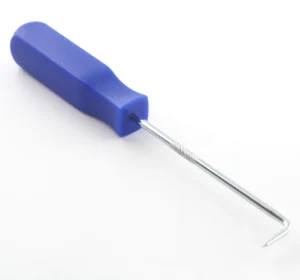
Loiding Tool
Two of the most common loiding tools are shove knives and traveler’s hooks. All achieve a similar goal: pushing back the latch on a door that either lacks or has a poorly fitted deadlatch.

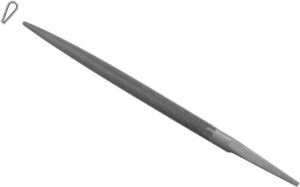
Shove knives are the older of the two. Above is a typical example. The other style is the traveller’s hook.
Above is a traveller’s hook. Both shove knives and traveller’s hooks do the same job, and generally speaking it boils down to personal preference. Both are cheap, so get both and see which works best for you.
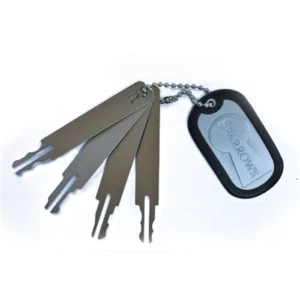
Seasame Decoder Tool
These tools are used for decoding combination locks that have rotating numeric digits.
Canned Air
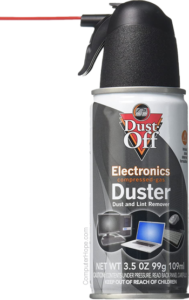
Canned air is useful for bypassing REX sensors.
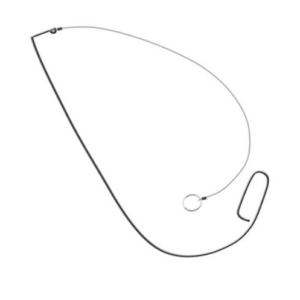
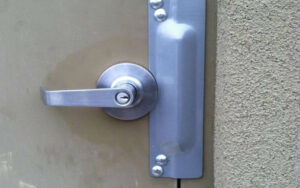
Piano Wire

Piano wire is useful for loiding doors that have a latch guard installed, as below. The wire has enough rigidity that you can snake it behind the latch from above, then pull the ends to push back the latch.
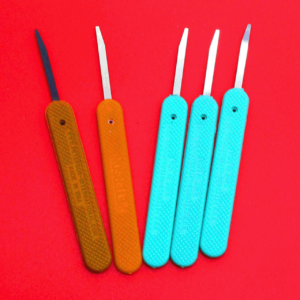
Impressioning Set
Impressioning allows you to make a key from a lock in place. I find it to be more useful on engagements than picking in many instances, because picking requires you to walk up to a lock and work on it for a while in a way that is going to look odd to most people. To impression, you have to make up to a lock, turn the key, and jiggle it up and down, which looks much less suspicious, and in the end, you get a working key.
To impression, I prefer a #4 pippin file, which leaves a good finish that makes seeing impressioning marks easier. The tear drop shape also allows easier precise cutting of the initial pin locations, which is critical to success in impressioning. I recommend a Grobert or similar quality make of file. While they are not cheap, they will last far longer than the cheap ones, which are often made of mild steel and case hardened, leaving a thin layer of high carbon steel which quickly wears away.
For holding the key, I usually just use a pair of vise grips, but there are dedicated key holders made for impressioning. I also like to carry 220 or higher grit sandpaper to polish the blank and make the marks easier to see. A lighted loupe also comes in handy for seeing the marks.
Vise Grips or Key Holder
During impressioning,you will need something to hold the key as you turn and apply tension to the key to make marks. I often use a pair of vise grips to do this, as the grip is secure and taking the key in and out is fast. There are also dedicated key holders specifically made for impressioning. I prefer Framon’s tool.
Key Decoder
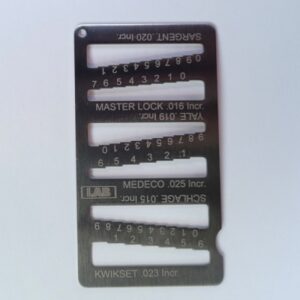
The most difficult part of impressioning is cutting the depths correctly. If you have a key decode such as the one above, you can cut the key where marks are appearing to the correct level by filing until you reach the appropriate depth, taking the guess work out of making the cuts and allowing you to cut the key more quickly.
You may also locate keys in the environment during testing that you might not be able to take. Using a key decoder, it is possible to read the cuts that can then be used to cut the key by code, either manually with a file or with a code machine.
These come in the form of metal guages like the above, which are inexpensive and cover the most common keys, as well as HPC’s pocket decoder which will allow the decoding of any key, but at greater cost and bulk.
Pre-scored Key Blanks
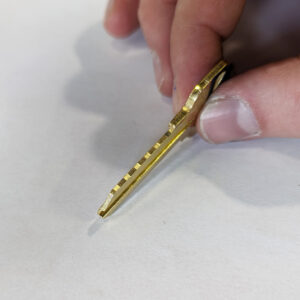
If you know what key blank is in use by the client, pre-scored key blanks are a great thing to have to make impressioning even easier. To prepare these, make each cut to the first depth of the key system in use. This again takes some of the guess work out of impressioning, as the spacing and first depth are correct, and will make your impressioning faster on site.
Pick Set

Picks sets come down to personal taste. My preferences is for Peterson’s picks. I find the handles to be more comfortable than most while giving good feedback. I also like their long reach tool. Their Ken’s pick set is the one I usually carry. I strongly recommend getting a kit that has euro/slimline tools to help pick restrictive keyways. A variety of tension tools is also important.
Common Key Set
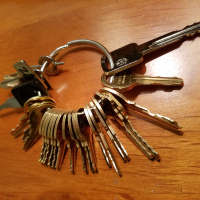
These sets include well known common keys , such as the Linear key that is common to most of their cabinets.
Hardware Keylogger
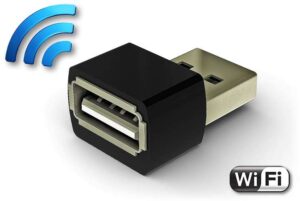
While cracking passwords is great, the ability to plant a hardware keylogger can mean access to key credentials without requiring password cracking. I especially like to place these on workstations used to add or remove badges to the access control system, since the ability to log in to that workstation generally results in the ability to perform useful tasks, like dump a list of all badges in the system, which will allow the cloning of the badge of an arbitrary user.
Proxmark
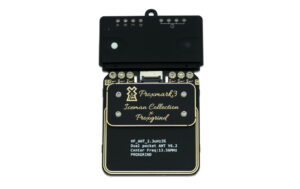
Not just a tool, but the tool for access control work. This tool will allow you to read and write badges, an absolute necessity for testing modern environments.